Wednesday, December 29, 2021

I Think It's Getting Worse

I think I've gotten into more than I bargained for.

I have made progress, though - 

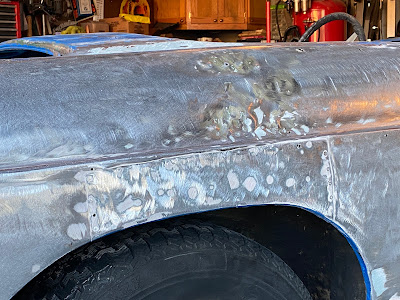
I replaced the passenger's side "dog leg" and fixed up the sill.

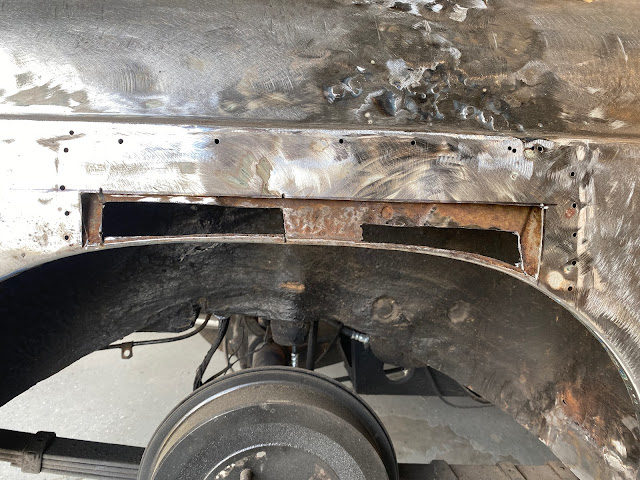
I then uncovered some more patch work on the front passenger's wing (which you can see in the above photo).  I made an inner and outer panel and repaired them, but I am not satisfied with the result; there are still too many pinholes in the outer panel and I couldn't get a solid weld on the bottom of the panel.  I will purchase a repair panel and cut this all out, then replace it.


I also used my new fancy stud welder dent puller on the rear passenger's wing, which turned out pretty okay given it was my first time and I made more holes than I wanted while doing it.  Then my neighbor came over and showed me how to do this right.  He's good.


I used my new knowledge to do a much better job on the top of the wing, where it had been bashed in pretty badly.  You can hardly tell now.

Finally, I took care of something where I am pretty proud of the result.  The top of the wing by the door opening had been bashed in (what HAPPENED to this car?) and was of course "filled" with body filler.  I straightened everything out as best I could to close the gap, then made a little patch and welded it in.  After a little work to add metal to the edge, the gap looks... pretty good!  And you can barely tell where I did anything.

It looks SO much better than before... and it's all metal.

I touched up a couple of other holes, including the spot where one of the top studs fits so it's secure (as opposed to being bondoed, which doesn't work for fittings).

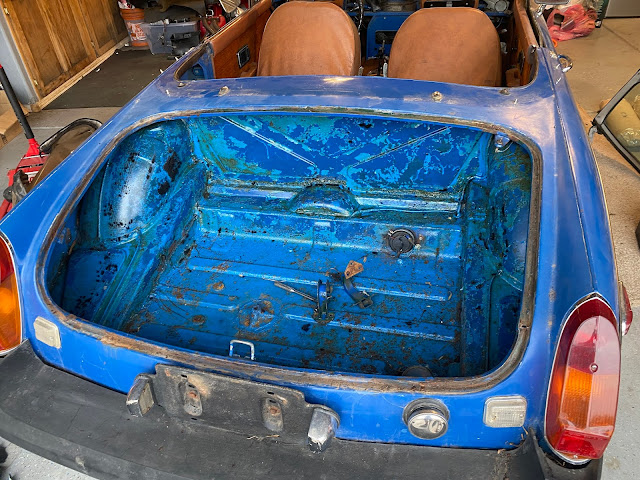
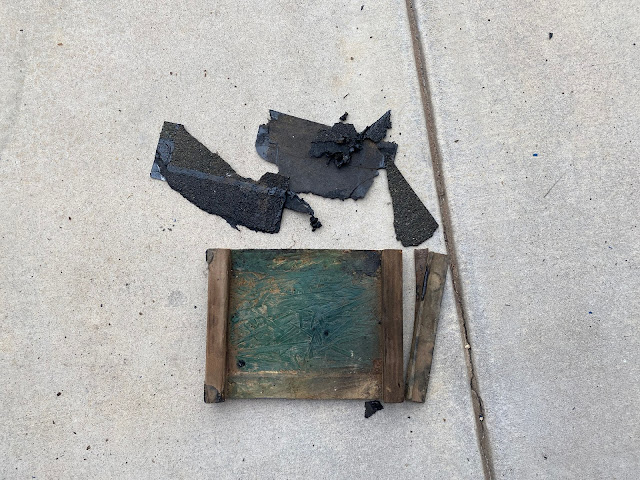
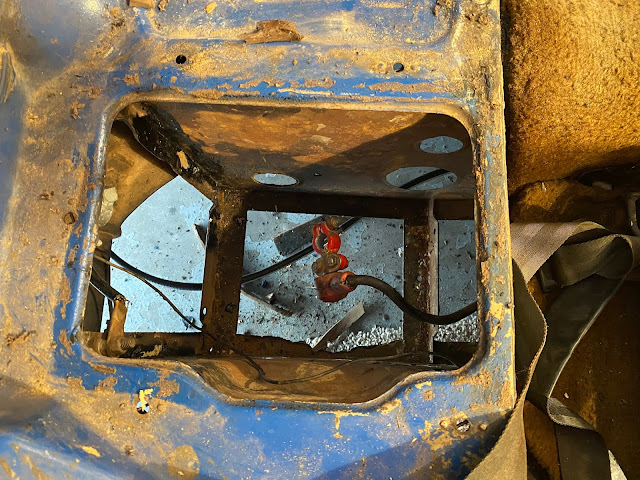
But then I found this.

I knew the outer panel was bad, but I didn't expect the inner panel to be that rotted.  (I cut the rot out - things don't usually rust in rectangular sections).  So now I have to fix that before trying to fix the outer panel.

But that's a lot to have done in a couple of days.  I have to fix the headlight bucket and replace my repair on the front wing, and the passenger's side is pretty much done metal-wise.  I will be using filler to make things look good - but a lot less than was there, and it won't be "structural".  This car won't be perfect but it will be solid and safe.

Then, it's on to the driver's side.  I know there's stuff there.  I have already ordered the driver's side "dog leg" knowing it will need replacement.  The sill is probably somewhat rotten too.  But one can hope - I expected worse on the passenger's side than what I found.

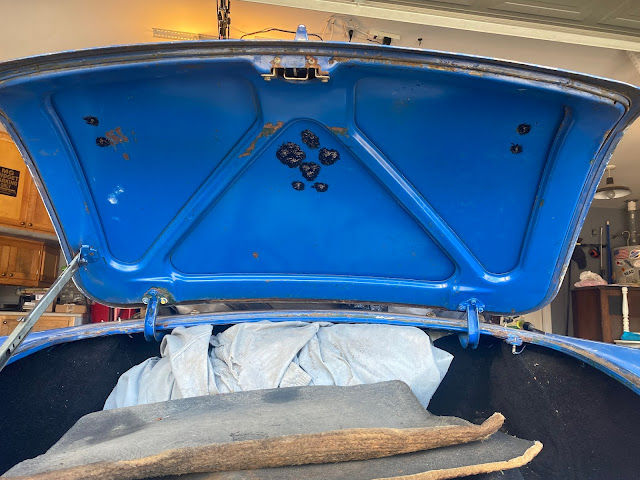
Then I have to fix the trunk (where I started all of this), and the front and rear aprons.  And THEN I have to scuff the whole car down, and THEN I get to do the filler work.  Oh, and I have to get the driver's side splash panel off so I can remove the antenna.  That ought to be a bunch of fun.

But after all of that - I can paint.  And then I can assemble.  At least I know she runs and will drive.

You know, I said I wouldn't do this again.  I suppose it's not exactly the same as Gidget's "Six Million Dollar Man" reconstruction.  But whoosh, I didn't want to do all of this... but the car will look really good and be safe, so it's worth it in the end.

Read more »

Wednesday, December 15, 2021

More Body Damage

Continuing on with the saga of body work... I knew there was something not-so-good under the paint.  But it could be worse.

I knew that I would need to do something about the passenger's rear quarter.  There is an obvious repair there that I was not happy about, but I was hoping it was easy to fix.  It won't be terrible, but it's not good.


Those panels are riveted over the top of God knows what.  It looks like something got dropped on the car - The panel was caved in and very poorly yanked out.  There was 1/4" of filler in this area that was easier to chip off than to grind away.

I have a patch panel for the "dog leg" on the way.  That will take care of most of the problem at the bottom of the door.  The other piece - I'll have to cut that off (well, remove the rivets) and fix it properly.  And I have NO idea how to straighten that horrible work on the top of the wing.  I may have to buy a fancy puller.  So, tools!

I think this is the worst of it.  The headlight bucket rim on the passenger's front has some rust, but that's easy enough to fabricate.  I got the door to adjust up a bit and it fits the opening much better now.  The really expensive fixes don't have to be made, so I think I am getting away with a lot here.  The rest of the car can just be scuffed down and touched up to be ready for primer with only a couple of dents and dings to fill.


Read more »

Sunday, December 12, 2021

Disassembly

I always want to do a good job with things, even if I can get away with some short cuts.  But I can't make myself take them!  That means I did more than I planned and stripped Alice down to the bones.  And I'm glad I did.

The first thing to go was the gas tank.  I had planned to do that anyhow - but I thought that maybe I could wait until after paint to make the swap.  I decided to go ahead since I needed to drain the gas to remove the fuel pump and do a little sheet metal repair around the filler neck.

That old tank was... old.

I think Alice is happy to have it gone.  I sure am - the gas stank and you can see the detritus of 47 years (there's no way this thing was ever removed).  I had to cut some of the bolts out, but all the ones press-fit into the trunk floor remained intact.  I've got new ones anyhow.

But then I saw something disturbing.


No, that's not Michael Myers or the Necronomicon.  But it is rust where the spare hold-down resides.  A little poking with a screwdriver revealed...


It turns out that caulk does not have any structural integrity.  So it's more for me to repair.  This one's easy.  The others I found will be less fun.  But all in all, the damage is pretty much constrained to this area and I can work with it.

Next to go were the bumpers.  Our Lady of Auto Disassembly is still blessing me.  The bumpers came free with only moderate effort.  Here's the rear.  The valance isn't too bad - a little hammer work and a bracket for the exhaust, and she's ready for some finish work.


I then removed all of the trim, including the clips, followed by the front and rear side marker lights.  The front ones broke their studs while removing them (did I anger you, Lady?) but I have access to replacements.

Next up was the doors.  This wasn't that bad; in fact, it was easier than taking apart Gidget's doors (because they're bigger).


After drilling out the rivets holding the remnants of the glass outer door seal in place, that door was done.  Then I did the other one.  The doors are in good shape with only a mall amount of repair needed to the passenger's door.

By the way, I think this car got hit pretty hard in the passenger's rear quarter.  It's been put back together - and while it's pretty straight, there are lots of cobbled together  items that I will have to replace.  I really dislike having to fix other people's shoddy work, because there really was no excuse for not finding the correct parts (like nuts and bolts and retaining clips).  The only thing I can think of is money - either a lack of it, or the desire to take it from someone.  I suspect the shop that worked on this car just "made it work" and may have taken advantage of the PO.  Sad.

Anyhoo, let's keep on truckin'.  After the doors were disassembled, I figured it was time to box everything I had taken off so far.  All the parts are in bags, even the stuff I will replace, so I know what to replace.

There wasn't much left to remove.  Clips, fasteners, and all the rest of the small chrome bits.  I removed the door sill plates (I think I will have to replace them - they look pretty bad).  I also finished cleaning out the interior, by hand, with of all things a gasket scraper.  It did a really good job without damaging paint (much) or the sound deadener inserts on the floor.

Here's what I started with on one side...
Here's the first pass...
And the final pass.  Much better, eh?

And the best part is, it doesn't smell any more.  It was pretty rancid in there.

So I'm almost ready to start rust repair.  I have the car completely stripped with the exception of the headlight buckets, whose screws refuse to come free.  I must make an offering to the Lady and see if that helps.  I even removed the defrost vents and the vinyl covering the gap between the windscreen and the dash, though I saved it for use as a template.


Once sheet metal repairs are done, I'll get those stickers off and start prepping the body with some minor bodywork and scuff it well to get ready for paint.  (Of course, there's more than that - but much of the car doesn't need more than that, which is a refreshing change from the FIVE YEARS I spent on Gidget's bodywork.)
Read more »

Thursday, December 2, 2021

Body Blows

I'm going to paint Alice a nice light blue color (Florida Blue, close to Iris Blue), and to do that the car needs to be ready.  So it's time to get started.

Here's the color.  Isn't it pretty?


There isn't a lot more to take out or off of the car.  I already removed the dash and consoles.  The windshield came out by removing 6 bolts.  The seats came out after another 4 (and thankfully, they all came out easily enough).  Seat belts are three more per side.  I did find some rot - not bad, but needing repair.  I also found that the passenger's side rear wheel arch was repaired, rather poorly, and instead of welding in a bung for the seat belt mount a bolt was shoved through a hole.  Not good... so I'll get a grade 8 nut, make it round and weld it in place.

After all that fun, I removed the interior carpet and panels.  Ugh.  Smelly, crumbly stuff.


I vacuumed all that crud out and I'll have even more fun scraping out the padding that was glued down by the PO's shop.

I then tackled the boot.  Boy oh boy.  This is what really gets me - instead of doing the right thing of replacing the trunk lid seal (which in a B is attached to the lid or the car, but not both), the shop left the original (rotted) seal, found something that would fit and glued it into the rain channel.  So not only is the trunk lid rusted, so is that channel.  It would have taken all of an hour to remove the lid and remove the seal, and install a new one properly.  It took me longer because of the decay, but it did come out.


Then, the carpet came out.  It's seems like it was put in to hide things.

Most of the metal is intact.  There are parts around the fuel tank filler neck that will have to be cut out and replaced.  I also get to have the fun of removing all that glue so the boot can be painted properly.

Lastly, I cleaned out the battery box.  The PO got creative with their repairs... 


Yup, that's a shingle.  I give an A for effort but liners were available even then, so I'm not impressed.

I also see a wire threaded through the remains of the box (which is actually more intact than I expected to see).  That's the fuel pump lead.  I'll have to reroute that with new wire to where the harness actually goes, as the original wire is nowhere to be found as a remnant from the harness.  I have a battery box liner that will fit here and I have the lid, so I am not worried about safety once I fix it properly.

Now I have lots of crud to scrape out and trim and bumpers to remove, and doors to disassemble.  I will drop the fuel tank and replace it with a new, touring model (16 gallons; over 400 miles of range!) along with the rubber bits.  The pump appears to be okay, so I'll keep it for now.


Read more »