Monday, March 21, 2022

The Antenna

I know it seems like an odd time to mention it, but I did finally remove the antenna.

It was the last bit of trim on the car, and I needed to get it off - but to do so, I needed to remove the closing panel for the driver's side fender.  I was rather nervous about removing it, both because I was afraid the bolts would not come out and that I would find horrors on the inside.  But my fears were not realized:


The panel came off easily - it had been removed before, as two bolts were broken off long ago.  The inside looked okay.  There is a bit of rot in the corner of the sill, but the fender itself is solid with no repairs evident.  So, I'm going to leave it alone.

The victory is in removing this:


Yay!
Read more »

The Home Stretch II

Closer... the dogleg is once again intact.

I made a patch to close up the last hole in the inner sill:


Then I made one for the outer sill.  I tacked it in place so I could verify the dogleg would fit over it.


Then I cut the outer panel to fit and test-fit it.  It took a while to get right so the panel just fit in place without having to be forced.  Bit it did fit, and it fit over the sill as well.


Then, I went back and welded the sill into place.


Finally, I welded the panel into place.  I think it turned out pretty well.


The best part is that the structure is correct (inner and outer sill, and dogleg) and solidly welded.  I'm very happy with this.  And it took me even less time than it did for the passenger's side... experience pays off, I guess.

Now, I just have the sill under the door.  I have a pattern that I made for the sill under the dogleg, which gives me the correct shape.  It will be a lot of welding for that panel.  But then all the major metal work will be complete!
Read more »

Tuesday, March 15, 2022

The Home Stretch I

I can see the light at the end of the tunnel, but I think it's a train.  I am getting close to wrapping up metal work on Alice, but it's going to be a long last mile... 

In what has become a familiar refrain, I knew there was something bad under the driver's side dogleg and sill.  I was hoping for the best -- but of course, I got the worst.  When I removed the flashing (yes, from a house) that covered both of them, I found...

That doesn't look too bad, right?  But wait for it...

Yummy.

Fine.  So, I started by cleaning things up and cutting out all the rot.

I sprayed everything with a rust converter to try and stop the spread, but you'll see that later.

I discovered I needed the closing panel at the back of the dogleg.  I had one - but it was for the passenger's side.  Fortunately, I have a vise and a hammer.  Now I had a closing panel for the driver's side.

To start, I made a panel to replace the rotted section of the inner sill.  It's a flat rectangle, so it wasn't all that hard.  I welded it in place, and then welded in my closing panel.  After a little cleanup, I have a sound inner sill once more.  Well, mostly.  I have a small spot I have to close up.

That's all I had time for this week, so stay tuned for our next episode!


Read more »

Going Topside

I knew there was something funky about Alice's cockpit surround on the driver's side, but I wasn't prepared for what I found...

I could tell there was filler in the area, so I started removing it.  And wow.

What the heck happened to this car? Did King Kong step on it?

This wasn't even worth trying to pull out, so I simply cut it out and replaced it.  I found some lovely rot I needed to repair underneath this house of horrors.


So much better.

There are still some areas around this which need a little attention, but those I can pull out with a dent puller to make it "better".

This took me all of three hours.  Why not do it right the first time?
Read more »

Monday, March 14, 2022

Rear Valance Repair

In this week's episode, I tackled some truly ugly repairs to the rear valance.

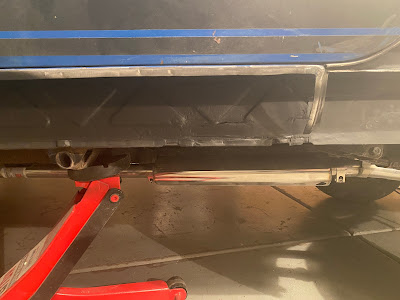
When I pulled all this apart, I knew there would be something to do...

You can see a really poor repair both to the upper and lower portion of the valance.  That... couldn't be left alone.

So I ripped it apart.

Oh, man.

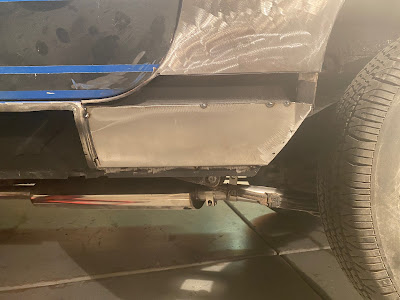
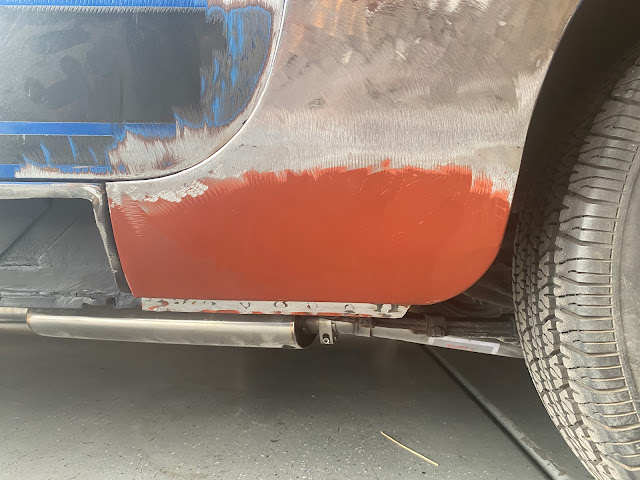
I also took off a pound of filler all along the bottom of the valance to reveal the true contour.  I spent MAYBE 15 minutes with a body hammer to straighten it out.  Now, it's close - and will need a light coat of filler for cosmetics - but nothing like what was there before.  And the dimple for the exhaust pipe is in the correct spot - I was able to save the metal and not have to remanufacture it.

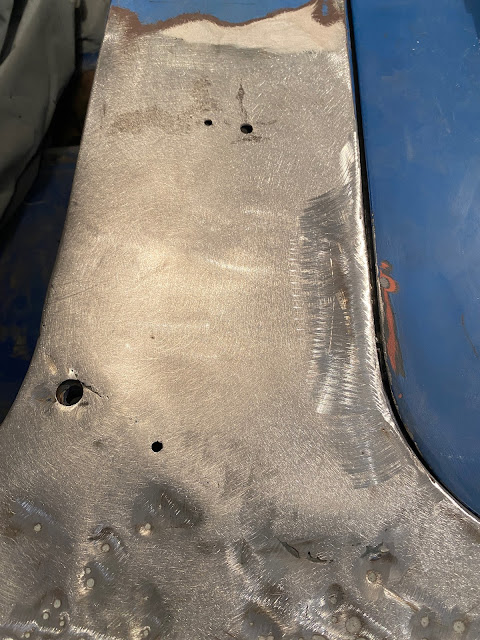
On to the repair work - First, I cut out the really bad stuff in the upper part of the valance, and pulled the metal out to an approximately correct shape. From there, I made a patch and welded it in place.  It's nothing terribly exciting, so I only have an 'after' photo - but the result is a lot better and the profile is pretty close.  It's not perfect - it will take some filler - but not the 1/4" that was there before.

I also removed all the old filler that caked the entire upper part of the valance and spent another 10-15 minutes restoring the shape.  It just isn't that hard, and once again stirs up disappointment in the PO's shop for such lazy work.

Doesn't that look better?

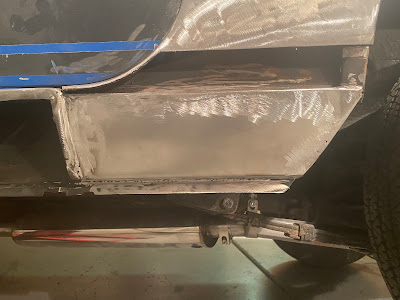
With the upper part repaired, it was time to fix the lower half.  I made a template, than a panel, and made it fit nicely with the correct contour.

The holes are to let me weld through to the structural members behind the patch panel.

Then, I welded it in place, closed up the holes, and voila!

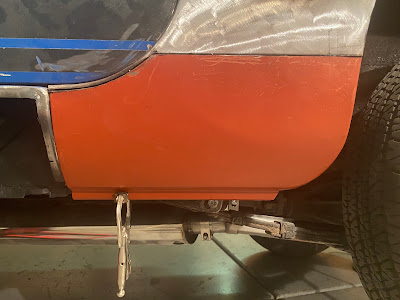
I drilled holes for the bumper mount and test-fit it.  It fits nicely and with a little work I can now adjust the bumper to fit symmetrically against the valance.  I welded up a few small holes, and can now call the back of the car complete (aside from a little more dent removal with a dent puller).

I mean, look at the difference...

I know which one I'd rather have.

Now, it's on to the driver's side.  I already know there's bad juju lurking under a couple of areas, and just hope it doesn't become the slog the passenger's side was.


Read more »