Monday, September 26, 2022

Cinderella!

Alice got her glass slippers this weekend...

I like them.  Juliette does too.

The only problem is that one has a slow leak.  Oddly, it's in the same locale where the old tire had a slow leak (the driver's rear).  I'm sure it's an easy fix.

I also finished up a couple of other things:

  • Ran a new fuel pump lead and wired up the pump, and installed the cover
  • Ran the wiring in the boot and aside from one fix, is connected
  • Ran the wiring for the front marker and headlights and hooked it all up
  • Installed the battery box and leads with hold-down (but I have to fix one that didn't hook in to its hole properly)
  • Installed the accelerator cable (by modifying a Midget cable, and it worked great)
I also got a start on the seats, but this isn't going well.  Watch for my next post...

Read more »

Wednesday, September 21, 2022

The Antenna Returns

I was happy to remove the old one, and happier to install a new one.

There's nothing special about it - I bought it for Gidget the Midget, but it didn't fit as it's a retractable antenna.   Now it's Alice's.


Read more »

Monday, September 19, 2022

Avengers... Assemble!

Now that Alice is wearing her new coat, it's time to make her look like a car again.  This weekend, I got a great start on that.

First, I went through all of these boxes and sorted things out.


I also painted the boot semi-gloss black, as I couldn't get it done in body color.  It would have been a huge pain in the... boot.

I did all of the 'easy stuff' first.

  • Installed the horns and front grille
  • Assembled the front bumper and mounted to the car
  • Mounted the rear bumper to the car
  • Installed the rear and side marker lamps
  • Installed the exhaust system
  • Installed the gas tank and fuel pump
  • Installed the headlight buckets and lamps

I also had to make a trip up to Prescott Valley to source some new headlight buckets.  The ones on the car had rusted through and were not repairable.  Fortunately, these buckets are ubiquitous and were easy to source.  I got a couple of good ones and cleaned them up.  The original wiring was okay and has been cleaned and reused.

The result looks like a car!

I love the look of the body painted bumpers.

That was enough for Saturday.

Sunday was much less productive.  I managed only a few things:

  • Install the logo on the boot lid
  • Install the heater and fresh air vent
  • Install the battery box and new leads
  • Install the fuel lines
  • Clean up the license plate frame

That heater was a bear.  There is a rubber block that acts as a seal between the heater box and the interior.  That block does not compress like the original closed-cell foam seal.  I ended up trimming the top 3/4" of the block back by 1/4" and using some closed cell strip foam to make up the gap.  The heater fit with only a minimum of shoving after that.

But it's in.

Now I have to find some hose that will work to replace the rotted emissions canister hoses.  These are N/A from everywhere, it seems.  I am sure I can find something.

I'll keep working on stuff over the week and have a plan for next weekend:

  • Remove the bonnet and boot lids, install seals and pads, and remount
  • Rebuild the quarter lights with new seals
  • Mount the doors and install hardware and windows
  • Wire the car (plug stuff in and run a new power lead for the fuel pump)

I'll leave you with this.  It's so pretty!


Read more »

Monday, September 12, 2022

Paint II

It's been a long weekend... but Alice has her new coat!

First off, let me again extend my thanks to my friends Mike and Jack, and to Mike's shop Auto Renew.  This was a big thing for me and I will always be grateful.

Saturday

Saturday morning, we headed over to the shop around 10:30.  By 11, we were going over the car and fixing things that were not 'good enough'.  We broke for lunch and then Alice was in the booth getting her first coat.  The difference was amazing - and yet it was only the start!

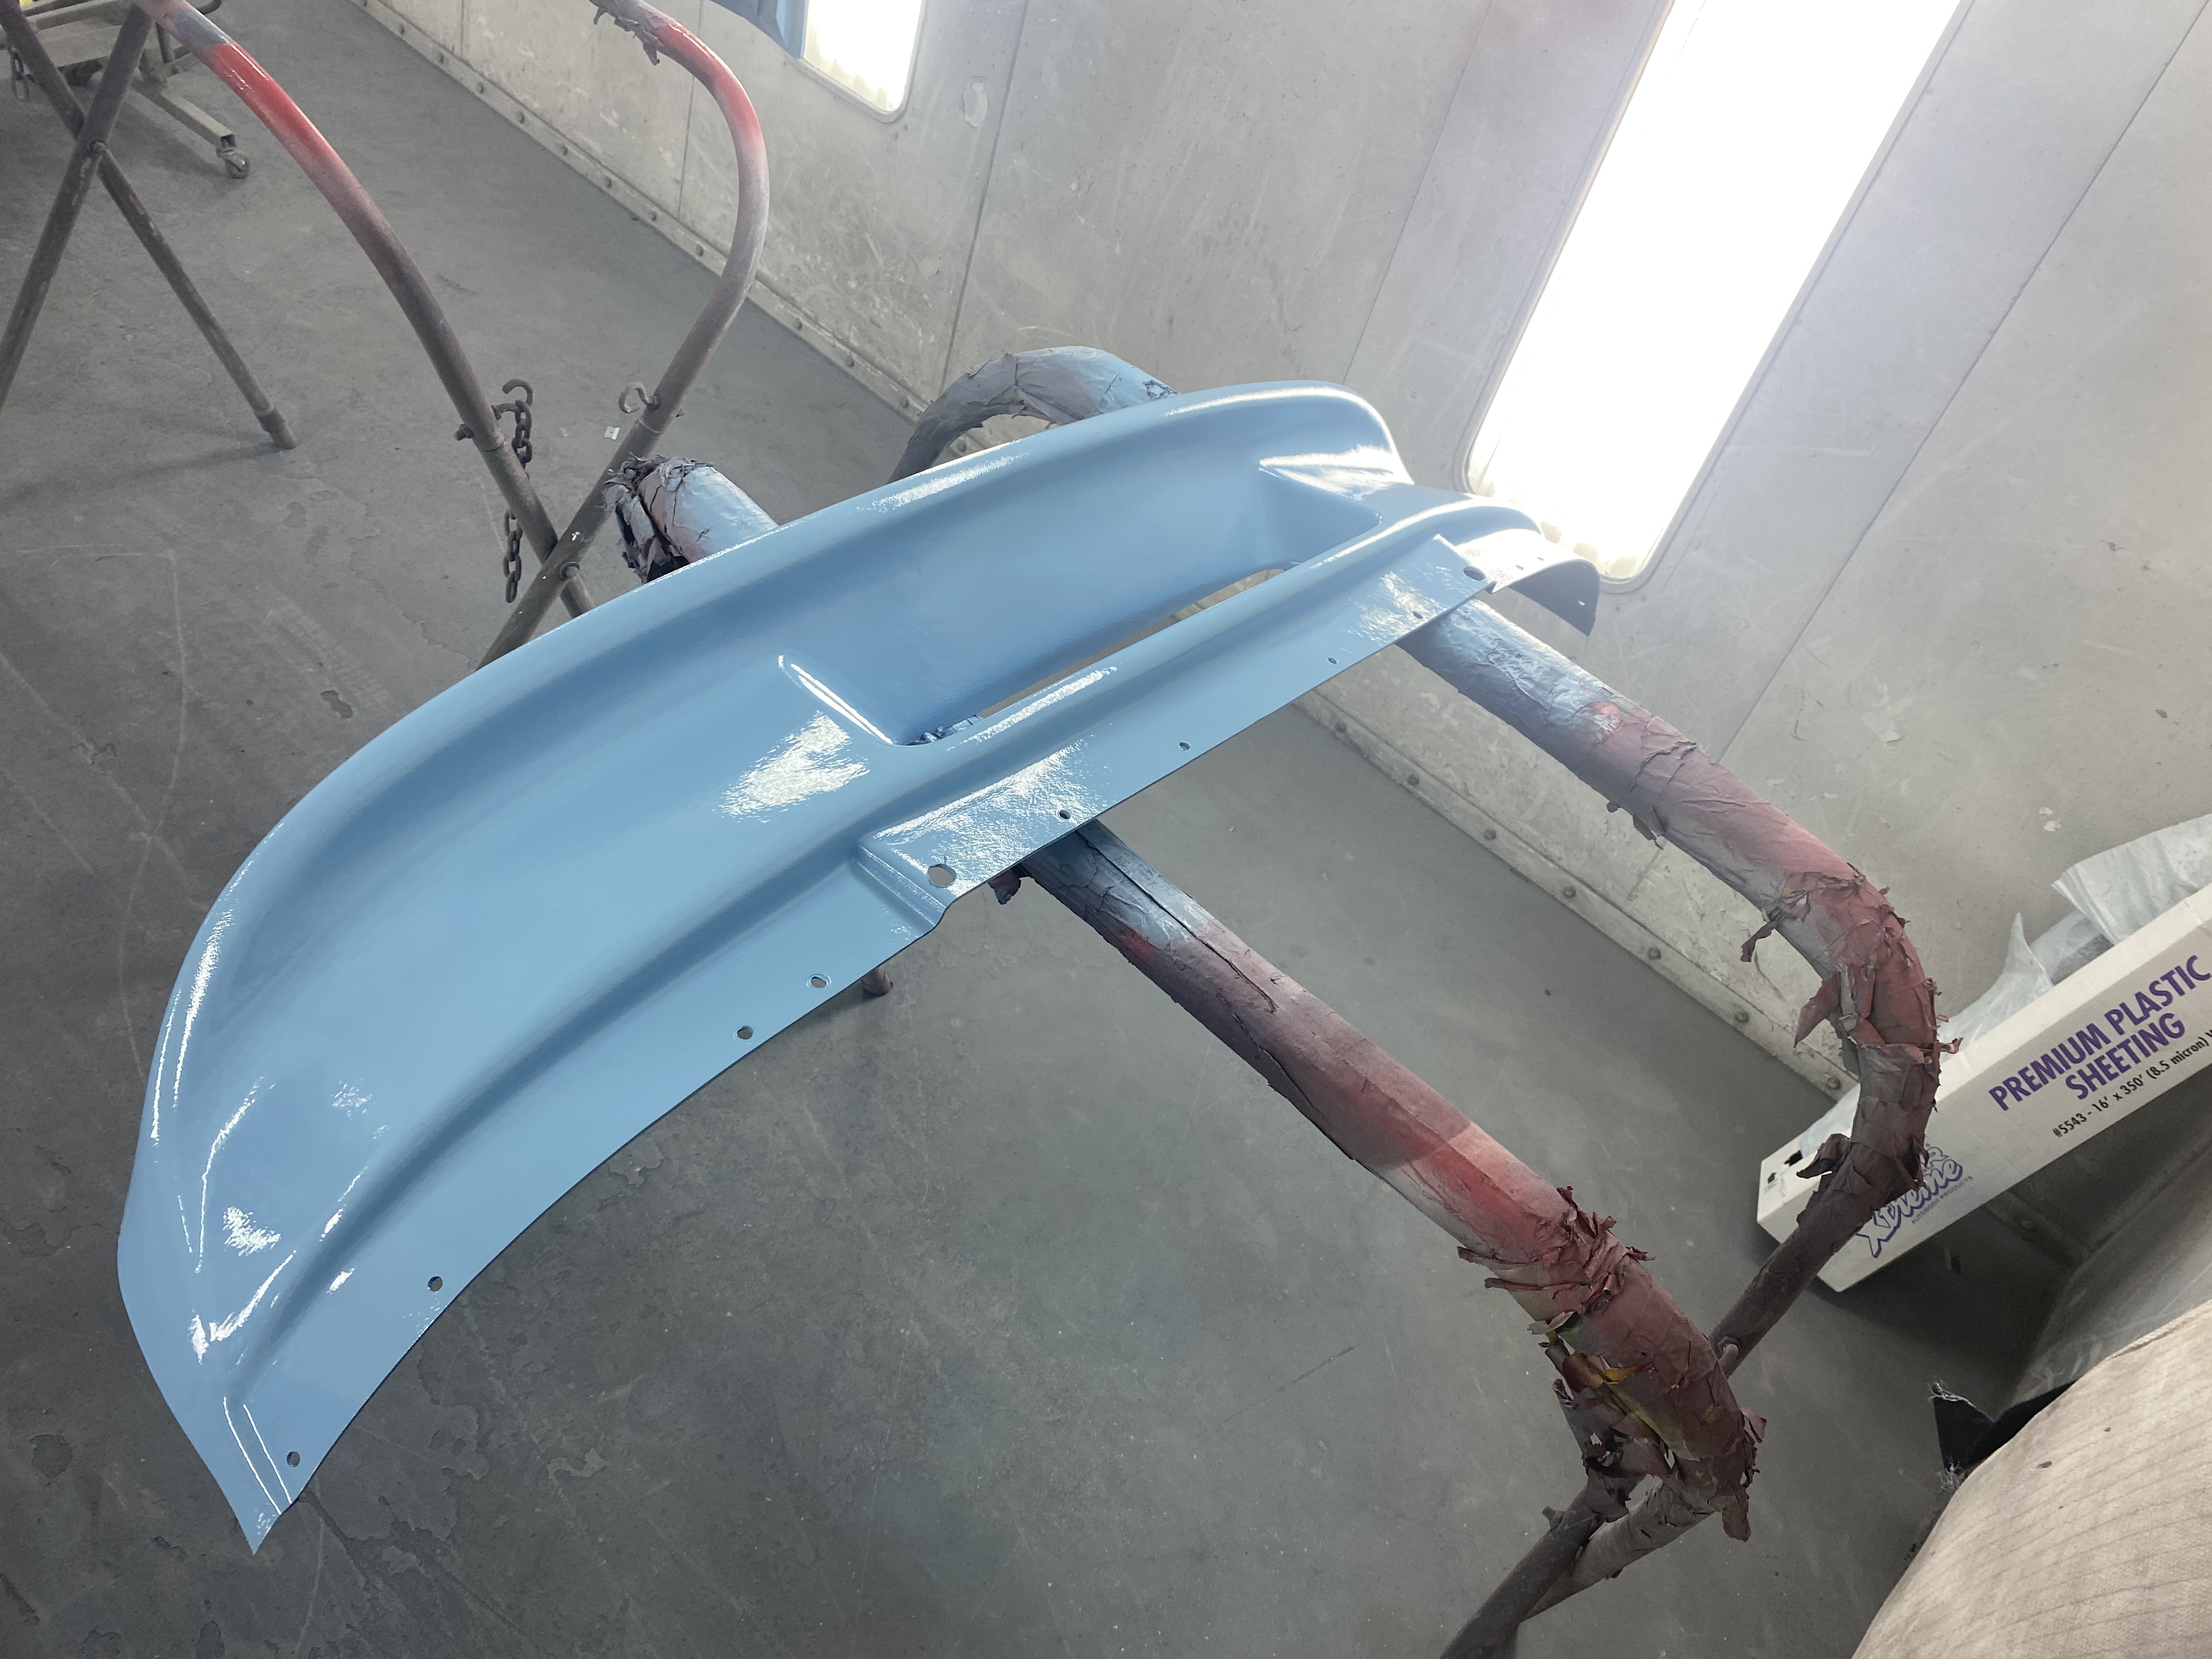
Mike put on 4 coats.  We ended up going through just short of a gallon.  I have an extra quart as a just-in-case but will use that for the hardtop next spring.

Here's some more pics of the final result while in the booth.  The color is deeper and covered really well.  Pictures don't do it justice.

We were done by 4.  Mike had a gig with his band Bloodsaw that evening in Mesa.  I don't know how he did it, but he made it!

Sunday

Sunday morning, I cleaned my garage.  A rare sighting of a clean workbench was recorded.

Mike, Jack and I headed back to the shop to bring Alice home.  After removing the masking paper and plastic, we fit the bonnet and boot lids for transport.  A couple of new tiedowns later, she was on the trailer and heading home.

Look at the difference in the color between being inside and out in the sun!

The trip home was uneventful and quieter, being Sunday morning.  Seeing her in the driveway was a huge relief.

Mike advised me to leave her outside all afternoon to let the sun do its thing and help bake the paint.  Later that evening, I pushed her back into the garage and got the doors and bumpers inside too.  Good thing - we had a thunderstorm overnight that would have spelled disaster had I left her outside!

At last, I could rest.  But I couldn't sit still for long.  I had to do a couple of things to let my mind wind down.  So I fitted the front spoiler and the badge to the front bumper.  Then I went to bed.

I also took a pic of the color with a sample of the interior.  It's going to be beautiful!  Again, the picture is a shadow of how nice she looks in person.

Now the real fun begins.  I have to haul everything out of the attic, sort it all and start assembly.  Juliette will be helping me a lot with this!  She says she is up for the challenge, so this is now officially the father-daughter phase of the project.  Hopefully my next post will show significant progress.  I want to have Alice together and running for Juliette's 18th birthday, which is exactly 4 weeks away from the time I wrote this... it's a big challenge!


Read more »

Saturday, September 10, 2022

Paint I

The day is here!  Alice gets her new look starting today.

My friends Jack and Mike are helping me out a TON with this.  Jack is the delivery man (he of the large trailer) and Mike is going to paint her.  His shop, Auto Renew is letting me use their facilities and paint booth.  Alice will get a professional paint job!  I can't thank both of these gentlemen enough for their help, but I'll certainly try.

First - we had to get Alice to the shop.  On to the trailer she went!  All the loose parts went into truck beds and cars, and we headed out.  The trip was mostly uneventful aside from one unexpected shift when we started out.  We cinched her down better and made it the rest of the way without incident.

No, we didn't transport her without straps.  This is the 'after arrival' shot.

Upon arrival, the challenge was to get her off the trailer.  The trailer is tall and the ramp steep.  With the help of a jack, we made it work.  On the way home, we'll need to cook up something a little friendlier.

We also beat a heavy but brief rain storm by about an hour.  My luck continues to hold!

Mike was not satisfied with the sanding job I did, so he went over everything again and he certainly did do a better job than I did in about 1/10 the time it took me to get my work done.  Everything went on to hangars and stands, and we (he) got ready to paint.

He then sprayed the doors, underside of the bonnet and boot, and the bumpers and spoiler with adhesion promoter, than the paint.  This is a single stage paint which is both stinky and sticky, and goes on like clear.  He also added a little 'flex' to the paint to give it a little extra give, which will come in handy for the bumpers and spoiler.

He did an excellent job with three coats and a little extra on the bumpers.  It's so pretty!

I tell you, I couldn't have done this to this level of quality.  Mike, you're awesome.

The finish isn't perfect.  There are a couple of issues (one low spot, one small crease, a couple of blemishes during painting) but I am more than thrilled with the result.  This is s nice driver quality renovation and will look great for years to come.

The next step is to go over the body shell and fix any remaining issues with spot putty, flip the bonnet and boot over and then paint them and the shell in one go.  Stay tuned for the final result!


Read more »

Monday, September 5, 2022

Spoiler Alert

I ordered a special tuning front spoiler for Alice, and it's neato.

The front valance on the car was really beat up.  I attempted to straighten it, but it really wasn't going to look good.  So I scouted around for a replacement.  I found one... but it would cost more to ship than the part itself!

I had been eyeing the 'special tuning' front spoilers from Moss Motors, but the cost was prohibitive.  But then I read online that sometimes parts coming from Europe are cheaper.  I looked the part up at Moss Europe, and sure enough it was almost 50% less.  Moss really likes to mark up their stuff when it gets here from the UK.  Even with shipping, the cost from Europe was below the cost in the US (before shipping).  I bundled a bunch of other bits I needed that were also cheaper, and saved a bundle.

I ordered the ABS plastic version instead of the fiberglass version as I had read it was more durable.  I was very pleased that it arrived in a week from the UK.  The fit is excellent and I only needed to bang on the car for an hour or so to get things aligned (mostly, straightening the driver's front wing a bit at that point).  I drilled some holes and fit it to the original mount points.  After a bit of shaping the edges to fit, it looks great!

The spoiler will get painted body color to match.

With that finally sorted, I turned my attention to the bumpers.  They were not quite so ready to go.  The rear bumper was nice but had a couple of scratches and chips, which were easily sorted out.  But the front bumper... oh, boy.

The front bumper was covered with poorly applied black paint.  The brace that holds the bumper in shape was twisted and bent.  I cannot understand how - but it was really out of whack.  I spent an hour straightening the bar and restoring the correct curve so that the brace fit properly and the profile of the bumper was correct.

The bumper material itself is a polyurethane something something.  It was also distorted.  I spent a good amount of time reshaping it gently with a heat gun and a heavy glove.  You can do this if you're very careful.  The material will melt if you're not.  In the end, I got a good result (not perfect, but good) and I'll take it.

From there, I moved on to sanding off all that gunk and cleaning up the bumper.  I then applied a couple of coats of an adhesion enhancer, which improves bonding of paint to plastic.  From there, I applied primer and sanded things down.  It isn't perfect, but it will look very nice once painted body color.

These are ready to go for paint.

Now, I just need to finish a couple of touchups and move everything to the paint booth!


Read more »