Wednesday, December 15, 2021

More Body Damage

Continuing on with the saga of body work... I knew there was something not-so-good under the paint.  But it could be worse.

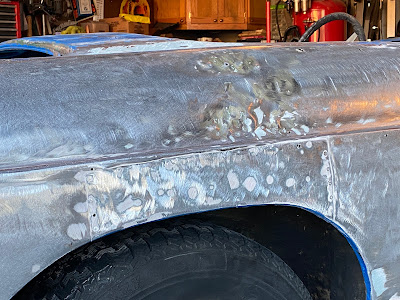
I knew that I would need to do something about the passenger's rear quarter.  There is an obvious repair there that I was not happy about, but I was hoping it was easy to fix.  It won't be terrible, but it's not good.


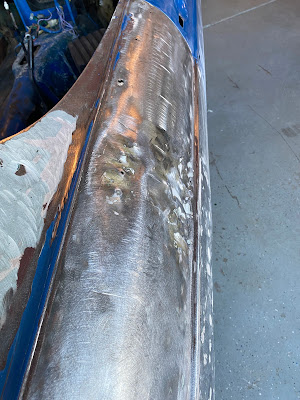
Those panels are riveted over the top of God knows what.  It looks like something got dropped on the car - The panel was caved in and very poorly yanked out.  There was 1/4" of filler in this area that was easier to chip off than to grind away.

I have a patch panel for the "dog leg" on the way.  That will take care of most of the problem at the bottom of the door.  The other piece - I'll have to cut that off (well, remove the rivets) and fix it properly.  And I have NO idea how to straighten that horrible work on the top of the wing.  I may have to buy a fancy puller.  So, tools!

I think this is the worst of it.  The headlight bucket rim on the passenger's front has some rust, but that's easy enough to fabricate.  I got the door to adjust up a bit and it fits the opening much better now.  The really expensive fixes don't have to be made, so I think I am getting away with a lot here.  The rest of the car can just be scuffed down and touched up to be ready for primer with only a couple of dents and dings to fill.


Read more »

Sunday, December 12, 2021

Disassembly

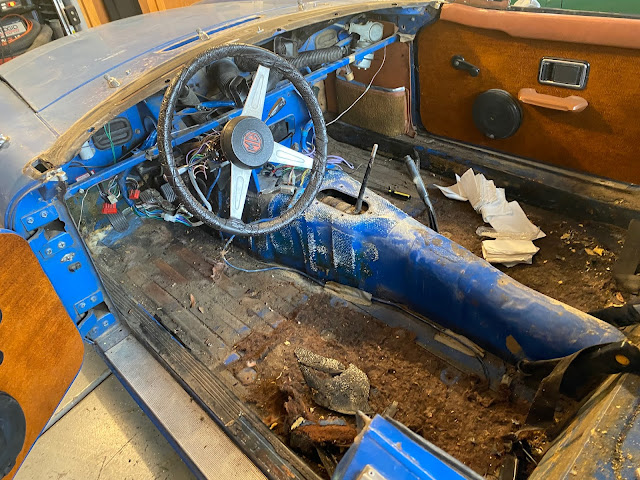
I always want to do a good job with things, even if I can get away with some short cuts.  But I can't make myself take them!  That means I did more than I planned and stripped Alice down to the bones.  And I'm glad I did.

The first thing to go was the gas tank.  I had planned to do that anyhow - but I thought that maybe I could wait until after paint to make the swap.  I decided to go ahead since I needed to drain the gas to remove the fuel pump and do a little sheet metal repair around the filler neck.

That old tank was... old.

I think Alice is happy to have it gone.  I sure am - the gas stank and you can see the detritus of 47 years (there's no way this thing was ever removed).  I had to cut some of the bolts out, but all the ones press-fit into the trunk floor remained intact.  I've got new ones anyhow.

But then I saw something disturbing.


No, that's not Michael Myers or the Necronomicon.  But it is rust where the spare hold-down resides.  A little poking with a screwdriver revealed...


It turns out that caulk does not have any structural integrity.  So it's more for me to repair.  This one's easy.  The others I found will be less fun.  But all in all, the damage is pretty much constrained to this area and I can work with it.

Next to go were the bumpers.  Our Lady of Auto Disassembly is still blessing me.  The bumpers came free with only moderate effort.  Here's the rear.  The valance isn't too bad - a little hammer work and a bracket for the exhaust, and she's ready for some finish work.


I then removed all of the trim, including the clips, followed by the front and rear side marker lights.  The front ones broke their studs while removing them (did I anger you, Lady?) but I have access to replacements.

Next up was the doors.  This wasn't that bad; in fact, it was easier than taking apart Gidget's doors (because they're bigger).


After drilling out the rivets holding the remnants of the glass outer door seal in place, that door was done.  Then I did the other one.  The doors are in good shape with only a mall amount of repair needed to the passenger's door.

By the way, I think this car got hit pretty hard in the passenger's rear quarter.  It's been put back together - and while it's pretty straight, there are lots of cobbled together  items that I will have to replace.  I really dislike having to fix other people's shoddy work, because there really was no excuse for not finding the correct parts (like nuts and bolts and retaining clips).  The only thing I can think of is money - either a lack of it, or the desire to take it from someone.  I suspect the shop that worked on this car just "made it work" and may have taken advantage of the PO.  Sad.

Anyhoo, let's keep on truckin'.  After the doors were disassembled, I figured it was time to box everything I had taken off so far.  All the parts are in bags, even the stuff I will replace, so I know what to replace.

There wasn't much left to remove.  Clips, fasteners, and all the rest of the small chrome bits.  I removed the door sill plates (I think I will have to replace them - they look pretty bad).  I also finished cleaning out the interior, by hand, with of all things a gasket scraper.  It did a really good job without damaging paint (much) or the sound deadener inserts on the floor.

Here's what I started with on one side...
Here's the first pass...
And the final pass.  Much better, eh?

And the best part is, it doesn't smell any more.  It was pretty rancid in there.

So I'm almost ready to start rust repair.  I have the car completely stripped with the exception of the headlight buckets, whose screws refuse to come free.  I must make an offering to the Lady and see if that helps.  I even removed the defrost vents and the vinyl covering the gap between the windscreen and the dash, though I saved it for use as a template.


Once sheet metal repairs are done, I'll get those stickers off and start prepping the body with some minor bodywork and scuff it well to get ready for paint.  (Of course, there's more than that - but much of the car doesn't need more than that, which is a refreshing change from the FIVE YEARS I spent on Gidget's bodywork.)
Read more »

Thursday, December 2, 2021

Body Blows

I'm going to paint Alice a nice light blue color (Florida Blue, close to Iris Blue), and to do that the car needs to be ready.  So it's time to get started.

Here's the color.  Isn't it pretty?


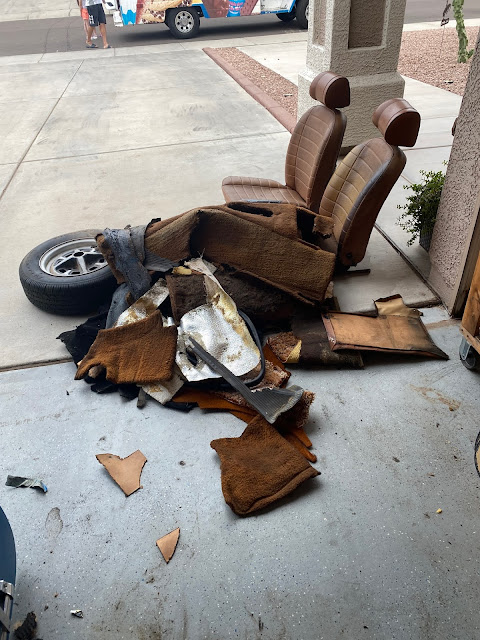
There isn't a lot more to take out or off of the car.  I already removed the dash and consoles.  The windshield came out by removing 6 bolts.  The seats came out after another 4 (and thankfully, they all came out easily enough).  Seat belts are three more per side.  I did find some rot - not bad, but needing repair.  I also found that the passenger's side rear wheel arch was repaired, rather poorly, and instead of welding in a bung for the seat belt mount a bolt was shoved through a hole.  Not good... so I'll get a grade 8 nut, make it round and weld it in place.

After all that fun, I removed the interior carpet and panels.  Ugh.  Smelly, crumbly stuff.


I vacuumed all that crud out and I'll have even more fun scraping out the padding that was glued down by the PO's shop.

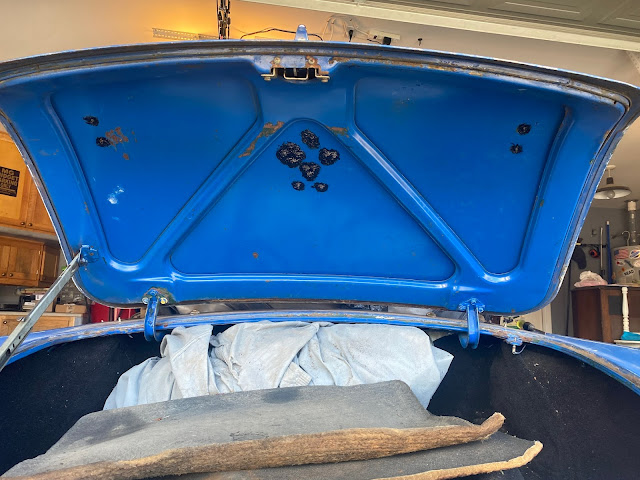
I then tackled the boot.  Boy oh boy.  This is what really gets me - instead of doing the right thing of replacing the trunk lid seal (which in a B is attached to the lid or the car, but not both), the shop left the original (rotted) seal, found something that would fit and glued it into the rain channel.  So not only is the trunk lid rusted, so is that channel.  It would have taken all of an hour to remove the lid and remove the seal, and install a new one properly.  It took me longer because of the decay, but it did come out.


Then, the carpet came out.  It's seems like it was put in to hide things.

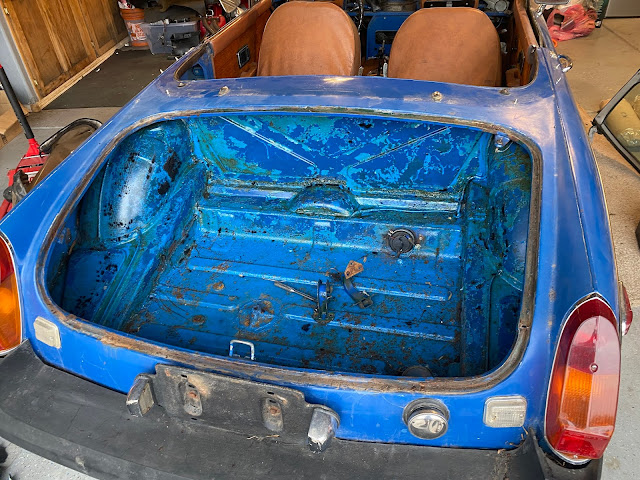
Most of the metal is intact.  There are parts around the fuel tank filler neck that will have to be cut out and replaced.  I also get to have the fun of removing all that glue so the boot can be painted properly.

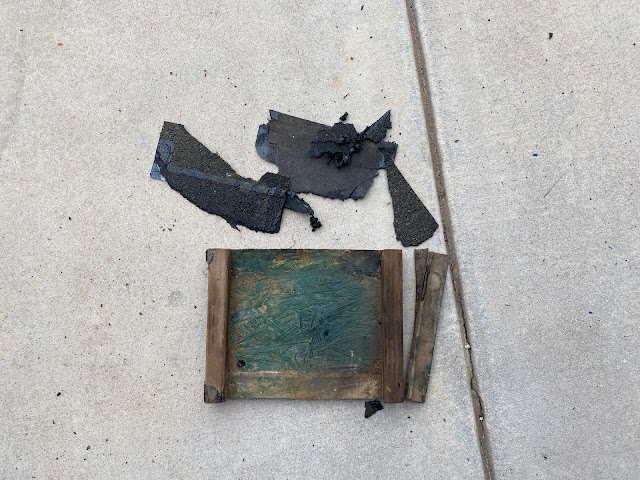
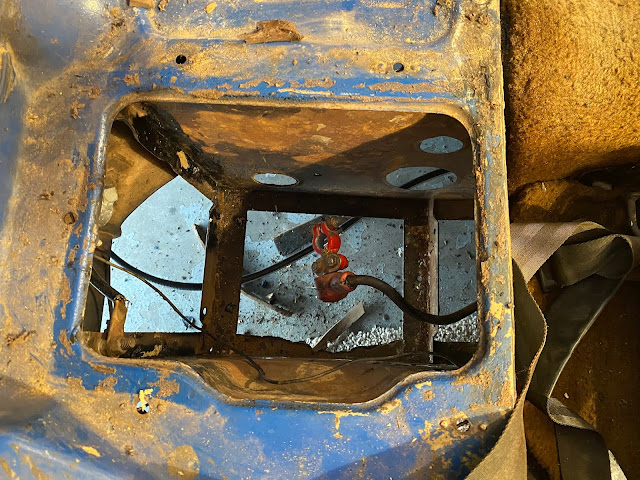
Lastly, I cleaned out the battery box.  The PO got creative with their repairs... 


Yup, that's a shingle.  I give an A for effort but liners were available even then, so I'm not impressed.

I also see a wire threaded through the remains of the box (which is actually more intact than I expected to see).  That's the fuel pump lead.  I'll have to reroute that with new wire to where the harness actually goes, as the original wire is nowhere to be found as a remnant from the harness.  I have a battery box liner that will fit here and I have the lid, so I am not worried about safety once I fix it properly.

Now I have lots of crud to scrape out and trim and bumpers to remove, and doors to disassemble.  I will drop the fuel tank and replace it with a new, touring model (16 gallons; over 400 miles of range!) along with the rubber bits.  The pump appears to be okay, so I'll keep it for now.


Read more »

Bring the Heat

The heater doesn't work, which isn't surprising.  Time to dig in while I wait for other stuff to happen.

After sitting for so long, the cables for the heater valve and the air vent are both frozen.  The heater valve works - which is great.  Replacing the cable was trivial, and with a cleaned up control switch it works fine (though actually having heat will have to wait until the car runs again).

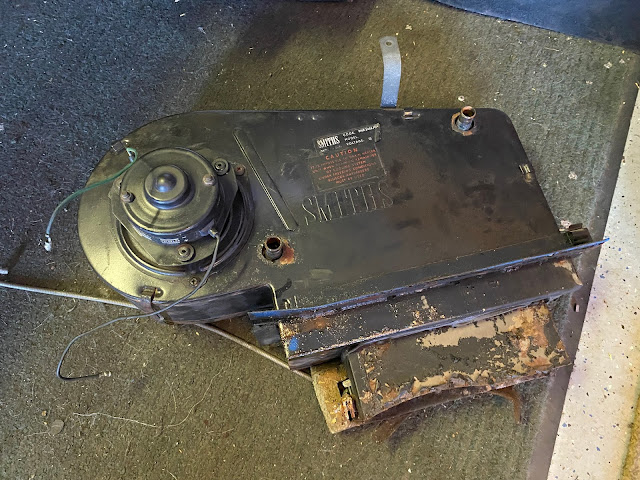
Unfortunately, replacing the cable for the air vent is not trivial.  You have to remove the box as a unit to get to the other end of the cable.  Getting the box out was definitely not fun - I doubt it had ever been removed, as evidenced by the fact it was practically glued in by the gaskets between the body and the box.  Getting the box in and out is a treat in itself - there is a specific maneuver to get the box out, by tipping it up and twisting to the left to get the part that pokes down into the cabin.  But it did come out.

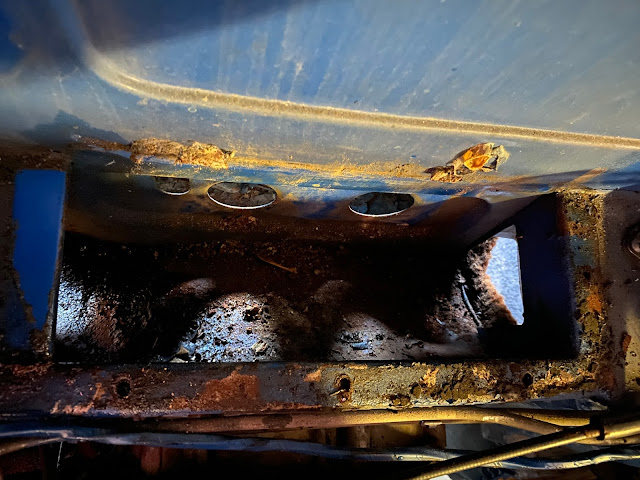
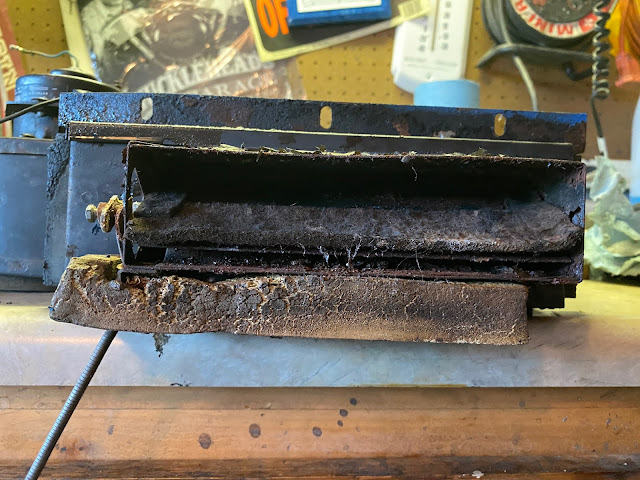
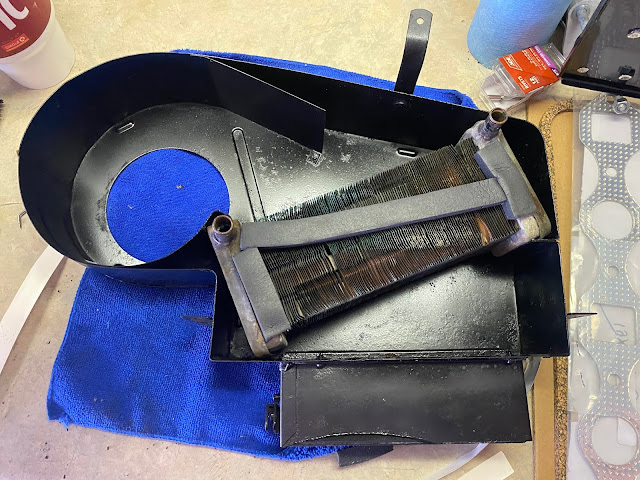
It is clear that there's a reason why the cable didn't move.  It wasn't the cable; it was the box.  Since the MGB has a BIG HOLE in the body that lets air in (and water, too) this is prime to rust to pieces.  Take a look.


But once again, Our Lady of Disassembly came to my rescue.  The mechanism did work free after some penetrant and a good wire brushing.  All that crappy felt and the body seal turned to dust and goo as I removed it.

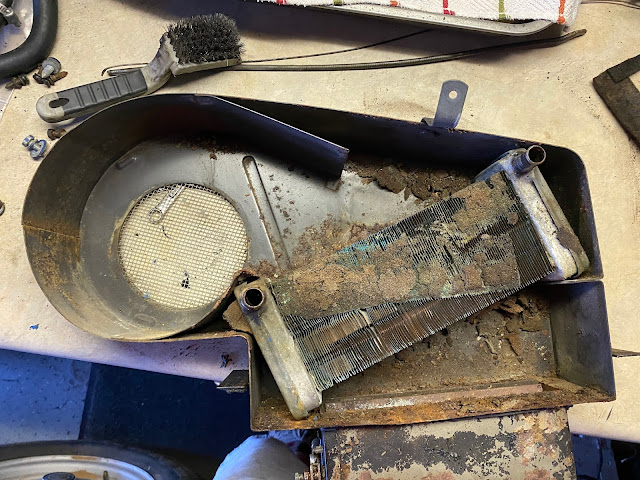
The inside isn't much better.

But cleaning makes a world of difference!

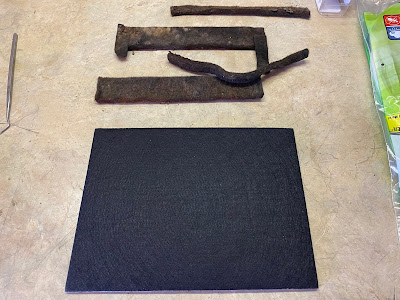
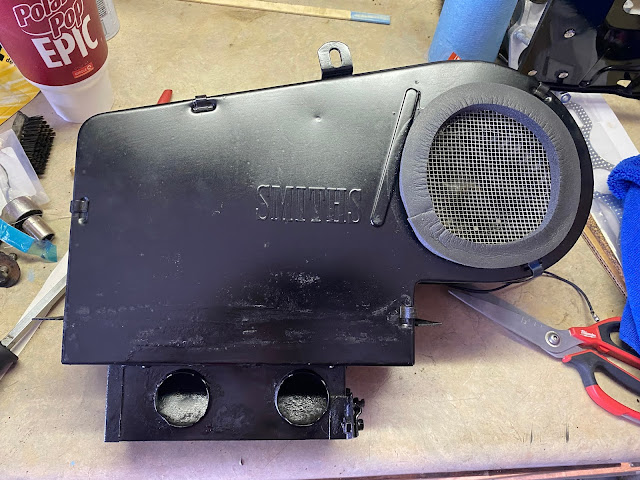
The heater flap cleaned up well with a lick of paint, and some 3/16" felt ($12 on Amazon).  It's got a nice sticky side that should keep it in place for a long time.  And since I don't ever expect this car to see rain again, it should last, well, forever.


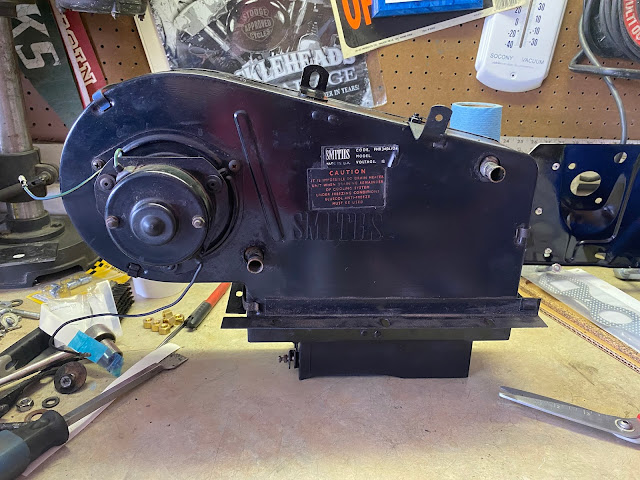
Some touchup paint makes the box look good and ready for reinstallation.  It isn't perfect - bit I am not going for a show quality job on this car.  It looks about like it should.  I did not repaint the front of the box, but just did a little touchup.


I tested the motor and it's fine.  I didn't disassemble it, because it doesn't come apart easily.  I gave it a squirt of lube just in case.  I installed the cable and it's working great - now, it waits until I paint the car.  (Future episode...)

Read more »

Wednesday, December 1, 2021

Carbs II

I'm back from a break, and I've got carburetors!

In our last episode, I had stripped and cleaned all the parts, and ordered rebuild kits.  Along the way, I also ordered a replacement exhaust (Bell stainless steel) and all the fixings.

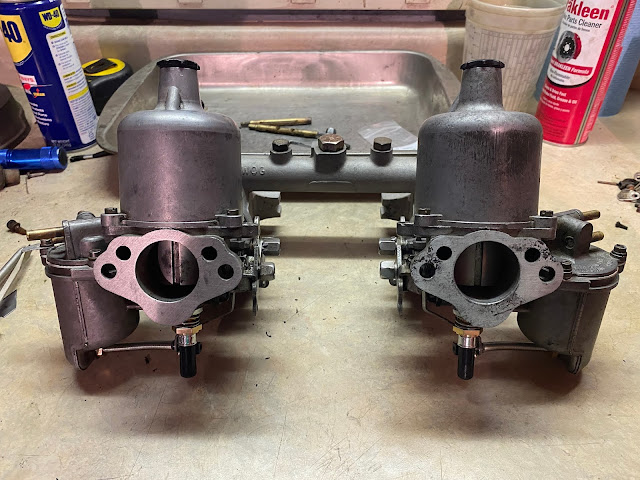
So, it was time to reassemble!  It's not difficult.  SU carbs are simple machines.  It was more work to get everything very clean than to actually put it together.  A little precision is needed, especially when fitting the throttle disc (butterfly), but it's kinda hard to get wrong.


The result:


Once built, it was simply a matter of installation.  (Snort.)  I had a good amount of work to do to find all the right matching parts, but I did have them... mostly.  It turns out the 18V engine changed the thread pitch of the manifold studs into the head (why? WHY?) and I had to wait on those.  But my donated manifolds fit perfectly, and the exhaust did too (after a seemingly ridiculous amount of time bolting up the header pipe - so frustrating to be able to touch things, but not get a socket on them).


I have to rebuild the rear (muffler) mounting bracket, as it is a) rusted out and b) was smashed out of the way by whoever installed the decidedly non-stock, not great exhaust that was there.

My only difficulty is one that people with this model year car that do what I am doing face: Note in the last photo, there is not enough clearance to install an air filter on the rear carburetor.  There is a solution (well, two): either install K&N "cone" manifolds which people complain about, or install a cold air intake sold by Moss, which is actually supposed to be pretty good.  But it's $250.  Yeesh.  This car's getting away from me budget-wise.  I'll end up going that route, I suppose, when I place a large order and can get some significant savings.

Regardless, I'm a step closer to mechanical completeness once again, and can't wait to fire Alice back up.  After paint, that is.  (But that's for a future episode.)

Read more »

Wednesday, October 6, 2021

Carbs I

I'm on a quest.  A quest to bring SU carburetion to Alice.  And I'm making progress.

The ZS carb and all the related emissions equipment is definitely a nonstarter for me.  The car runs - but not so well, and there are so many hoses and things that it just doesn't look maintainable.  So I'm going back to a simpler time, where dual SUs roamed the land freely and without fear.

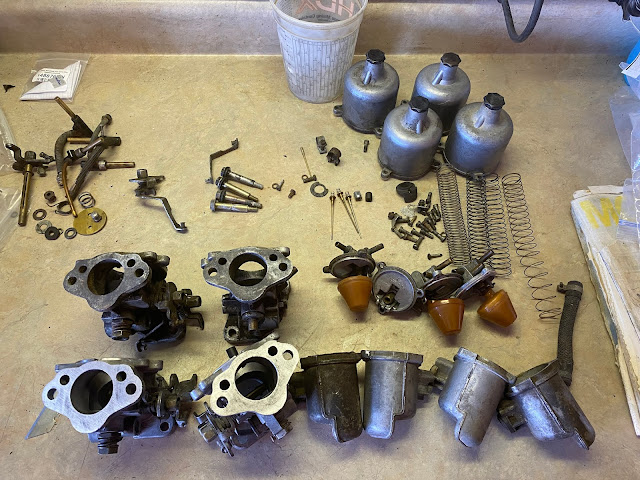
I've got lots of parts.  I have most of four HS4 carburetors, and an intake and exhaust manifold to match.  For me, job 1 is to get those cleaned up, starting with the carbs.

They don't look too good at first glance.  But there's gold in them thar hills.

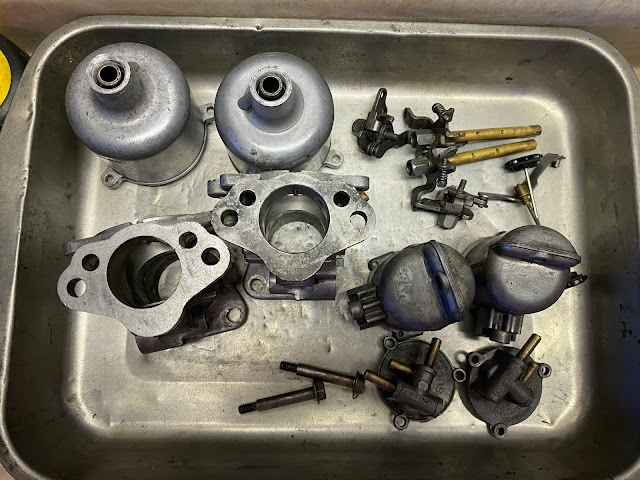
I have three AUD465s and one AUD405.  I have carb bodies with and without vacuum advance takeoff (I have a mechanical advance distributor, so I don't need it).  I have carb bodies with and without crankcase ventilation.  So I picked the two bodies that appeared to match up how I wanted and two dashpot/pistons that match in configuration and drop rate, and started cleaning.

B-12 Chemtool is my friend.

The result:

I still have some work to make the dashpots look nice, but all the components are clean and ready for assembly.  I now also have a rebuild kit for two carbs waiting for installation, and springs and needles and stuff too.  Fortunately, my car's dash has a blank where the manual choke would go, so my new choke cable will work out fine once I get the linkage I am searching for...

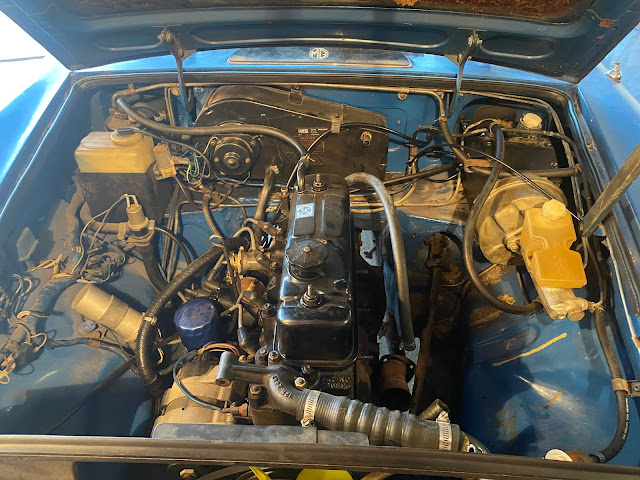
While that's going on, I got after the stuff in the car.  I removed the air pump, air rail, and manifolds.  Again, my luck holds - stuff comes apart on this car pretty easily.

I have much less stuff under the bonnet now... which will be replaced with HS4 goodness.

Next job under there is to remove the old exhaust system, which would have been replaced regardless.  I have a new Bell stainless exhaust on order to match the configuration I'm installing, and it will be glorious.

Next time: some carburetor rebuild action!

Read more »