Sunday, January 23, 2022

Back to Welding

Okay, break's over.  Back to metal.

I made some good progress this past weekend.  I think I may be done with the front of the car.  Mainly, the passenger's headlight bucket that was trashed and Bondoed.

I noticed some cracking of paint around the bucket and I knew the headlight rim was damaged (rusted).

It looks like someone ran into something, then got it 'fixed'.  Then, it rusted.

I wasn't going to just fill that back in.  So out came the broken metal, and in went the new.


That's soooooo much better.  A little filler to smooth it out is okay by me.

Then I closed up the hole in the headlight bucket.  (Not the big one, the rusted one.)

This doesn't have to be absolutely perfect since it's hidden behind the headlight bucket itself.  It will hold just fine and a little cleanup around the edge will make it invisible.

I may just be done with the passenger's side.  Back to the boot!

Read more »

Friday, January 21, 2022

Center Console I

I need a break from welding, even if it's a short one.  So I think I will tackle the center console.

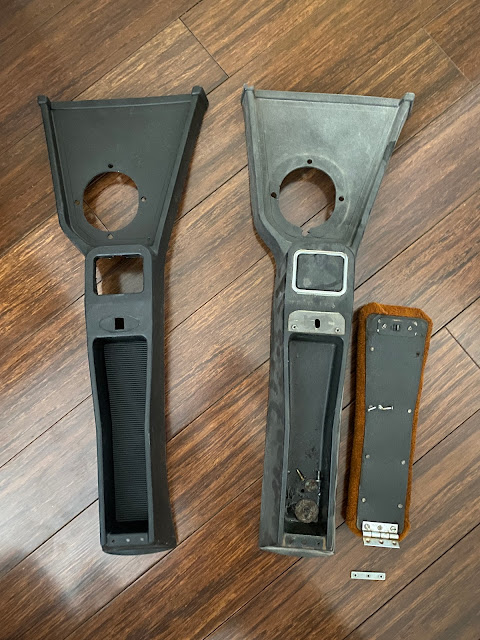
The easy part is ordering a new console.  The one I have is broken in the corner and a couple of other areas, and even with epoxy it won't last.  So I ordered one and all the bits.  Except for the striker (Stryker!), of course, because I forgot the one part I needed.

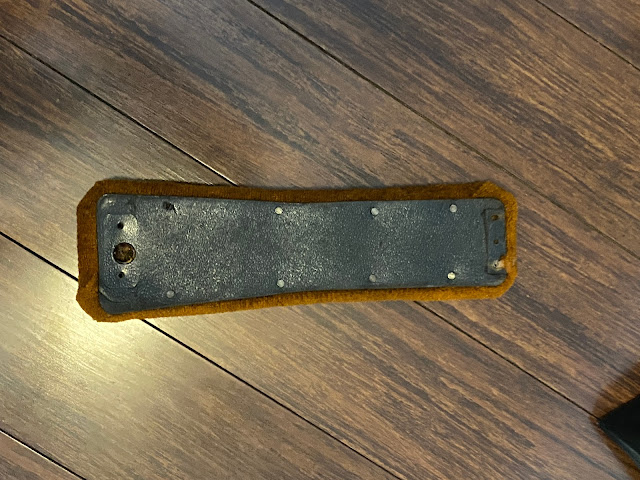
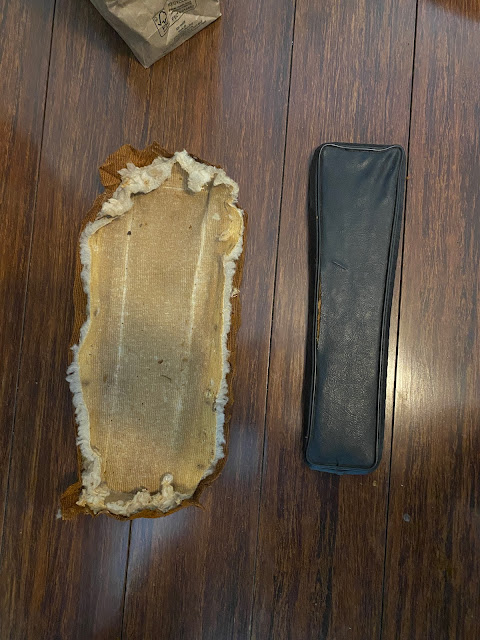
The part that worries me is the armrest.  The PO did some creative work to cover it, and who knows what's under there... so I endeavored to find out.  After removing a couple or three dozen staples, I received a pleasant surprise...

The original armrest is still there!  The foam is flat, but at least it's the right stuff.

I have a new armrest cover on order and will have to find some foam to improve it.  Stay tuned.

Read more »

Thursday, January 20, 2022

The Weldingverse of Madness

The more I get around this car, the more I find I need to do...

But for today's episode, I'm happy to have completed something really well - replacement of the bottom portion of the passenger's front wing.  Here's the basics and a little talk about welding, too.

Welding is something that is a bit of magic to many people.  How do you just cut off a piece of a car, and put a new piece back on?  The cutting-off part is up to you, but the putting-on (welding) part is really not that difficult with some practice.

First, make sure you have decent equipment.  I have a MIG (metal-inert-gas) wire feed welder with gas shield.  It's a Hobart 140, made by Miller, who makes really good stuff.

I also have a good welding helmet with a large viewing area and an auto-darkening window.  The helmet is essential!  Not only does it protect your eyes, it protects your face.  Welding goggles won't cut it - they will filter the brightness, but not the UV that is really what hurts your eyes.  (Think snow-blindness.)

Finally, welding gloves for up-close work are helpful to keep from burning your hands, though they make it a little harder to hold the gun (where the wire and gas come out).  Long sleeves and jeans are my usual garage attire when I weld.

MIG welding is a simple process.  The welder takes a ground to the thing being welded, and feeds charged wire through a triggered nozzle at an adjustable rate and power.  When the wire contacts the surface of the item being welded, it gets really, really hot - hot enough to melt the metal in that tiny little spot.  The composition of the wire aids in mixing the melted metals together to form a strong bond that isn't brittle.  The gas shields the weld area to keep oxygen out.  A 75%/25% Argon/CO2 mixture is a typical shielding gas for MIG welding.

Of course, it isn't that simple, but the process is really neat.

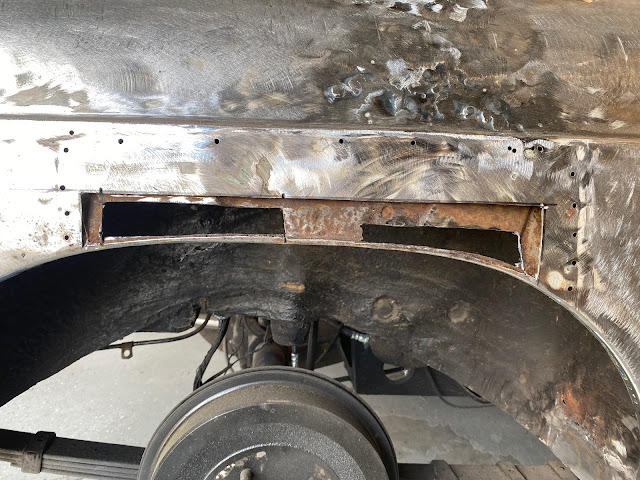
The first step is to remove the stuff you want gone.  Like this.

(I cleaned all of this up before I put the new panel in place.)

The next step is to get the piece you want to put in place, to fit.  This took me quite a while as the replacement panel did not "just fit".  I had to adjust the fit a couple of dozen times before I was satisfied.  In the case of this patch panel, I had to recurve the panel and rework the flange on the bottom where it attaches to the body so it lined up properly in all three dimensions.  I think it turned out well.

The fit along the weld line is critical.  There are a couple of common ways to fit panels: lap welding, where the new panel is either above or below the old; and butt welding, where the two panels do not overlap but instead their edges 'butt' up against each other.  (All you teenagers out there, yeah, I said 'butt'.)  Butt welding is to me preferred and what I did here.  The gap between the panels must be even and tight, but there needs to be a tiny little give in between so the panels have room to expand slightly from the heat of welding.  (Welding makes things very hot - and hot things expand.)  I have a couple of magnets to hold the panel where I want it before I start.

Preparation of the surfaces is also key. You can't weld rusty metal!  The oxides in rust (iron oxide) will blow anything you try to weld right apart.  The metals must be clean and thick enough to withstand the heat of welding.  That's one of the most difficult parts of rust repair for me - cutting back what looks like good metal because it is too thin to be welded, to find a solid base for the repair.

Once the panels are lined up and clean. it's time to begin welding.  This is where experience comes into play - not just with the process, but with your equipment.  For example, the recommended settings for my welder are "power: 2, speed: 30" for this thickness of metal and wire diameter (.023"), but that blows holes in the panel very quickly (by heating things up too fast and making them into vapor).  I use "power: 1, speed: 40" and it is quite effective, but that's my setup.  The sound of a good weld is that of "frying bacon", and getting that figured out with your welder takes a little time and practice.

The start of every repair job is to tack the repair into place.  This let you see that you like the fit and easily undo and reset if you make a mistake (like the panel alignment not being flat).  It also lets the overall weld area stay cooler and minimize distortion.  Like this:

The repair is held in place with many small spot welds, and distortion is pretty small (about 1/16" measured with a ruler).  I will be able to do a little 'massaging' afterward and get things even closer.

As I applied spot welds, I did not go one after the other in a row.  I tacked the panel at each end, and a couple in the middle, and then let it cool down a bit.  I then jumped around with more tack welds to keep the heat even, and when done I let it all cool down.

Now that the panel is tacked in place, it is time to fill in the gaps between tack welds.  For this, you want to lay a short bead of weld, once again jumping around to keep heat distribution somewhat even and distortion to a minimum.  There are two techniques for this: "pushing" and "pulling" the bead.  "Pushing" means you aim the wire at (toward) the thing you are welding, then as you weld you push little dabs of weld into what you just welded.  "Pulling" is the opposite; you aim the wire away from and drag the weld along.  They both work, but I tend to 'push'.

It is hard to weld thin metal like this, as the metal heats up so quickly it vaporizes.  To combat this, you want to spread the heat around a little by zig-zagging up-and-down (or left-and-right) ever so slightly.

The key is to get a reasonably flat weld that penetrates through the metal so you have the maximum amount of strength.  Too little heat will leave a bead on top of the panel, but not hold it; too much will almost immediately vaporize the metal.  Practice and knowing your equipment is key.

In the end, the panel is fully stitched into place.

The weld is complete, flat and clean.

Once cleaned up...

Afterward, a little filler to smooth out any small waves will make everything look perfect.  Unless you're a master metal worker, that's gonna happen.  I'm not bad, but not that good.

Like I said, this takes practice and time.  Many times, many, many time you will have the weld too hot and blow holes in the panel, or perhaps not have it hot enough and not get good penetration into the metal.

See? Welding isn't so hard.  Like everything in life, preparation and practice is the key to success.

Read more »

Monday, January 3, 2022

More Welding Fun

I'm stalled for a bit waiting on repair panels, so I decided to take a swing at repairing some of the damage in the trunk.

First up: the big hole where the spare tire carrier goes.  I had to cut out quite a bit to find good metal.

This wasn't a difficult repair.  I made a patch panel and welded it in.

I got good penetration through the panel and it's solid.  The entire floor has a lot more rigidity to it now.  I need to weld the spare tire carrier plate into place, after some cleanup of that part.  It looks ugly but the individual part appears to be N/A, so I'll make it work.

The other hole I tackled was the fuel pump mounting point.  This one was a bit more challenging since it's got a curve where it transitions from the back to the bottom of the floor.  I found a 21mm socket had the right radius to bend the patch panel to fit, and it turned out pretty nice!


The astute observer will notice the lack of the big hole where the fuel pump goes.  I'll cut that next - I wanted to get the panel in place first.

Here's where I ended up.

Notice the newly discovered hole on the driver's side.  There is some shoddy repair work under there which I will clean up first.  I found a few small holes to fix in random spots as well.  I still have to work on the fuel tank filler neck area as well, which will be interesting since there's a lip I have to make for the seal between the tank and the floor.  But this is actually coming along well.

I also bought a new welding helmet with better visibility and a larger viewing area.  That helped a lot by not having to guess-and-weld as much.  Good tools make for good results!

Read more »

Wednesday, December 29, 2021

I Think It's Getting Worse

I think I've gotten into more than I bargained for.

I have made progress, though - 

I replaced the passenger's side "dog leg" and fixed up the sill.

I then uncovered some more patch work on the front passenger's wing (which you can see in the above photo).  I made an inner and outer panel and repaired them, but I am not satisfied with the result; there are still too many pinholes in the outer panel and I couldn't get a solid weld on the bottom of the panel.  I will purchase a repair panel and cut this all out, then replace it.


I also used my new fancy stud welder dent puller on the rear passenger's wing, which turned out pretty okay given it was my first time and I made more holes than I wanted while doing it.  Then my neighbor came over and showed me how to do this right.  He's good.


I used my new knowledge to do a much better job on the top of the wing, where it had been bashed in pretty badly.  You can hardly tell now.

Finally, I took care of something where I am pretty proud of the result.  The top of the wing by the door opening had been bashed in (what HAPPENED to this car?) and was of course "filled" with body filler.  I straightened everything out as best I could to close the gap, then made a little patch and welded it in.  After a little work to add metal to the edge, the gap looks... pretty good!  And you can barely tell where I did anything.

It looks SO much better than before... and it's all metal.

I touched up a couple of other holes, including the spot where one of the top studs fits so it's secure (as opposed to being bondoed, which doesn't work for fittings).

But then I found this.

I knew the outer panel was bad, but I didn't expect the inner panel to be that rotted.  (I cut the rot out - things don't usually rust in rectangular sections).  So now I have to fix that before trying to fix the outer panel.

But that's a lot to have done in a couple of days.  I have to fix the headlight bucket and replace my repair on the front wing, and the passenger's side is pretty much done metal-wise.  I will be using filler to make things look good - but a lot less than was there, and it won't be "structural".  This car won't be perfect but it will be solid and safe.

Then, it's on to the driver's side.  I know there's stuff there.  I have already ordered the driver's side "dog leg" knowing it will need replacement.  The sill is probably somewhat rotten too.  But one can hope - I expected worse on the passenger's side than what I found.

Then I have to fix the trunk (where I started all of this), and the front and rear aprons.  And THEN I have to scuff the whole car down, and THEN I get to do the filler work.  Oh, and I have to get the driver's side splash panel off so I can remove the antenna.  That ought to be a bunch of fun.

But after all of that - I can paint.  And then I can assemble.  At least I know she runs and will drive.

You know, I said I wouldn't do this again.  I suppose it's not exactly the same as Gidget's "Six Million Dollar Man" reconstruction.  But whoosh, I didn't want to do all of this... but the car will look really good and be safe, so it's worth it in the end.

Read more »